
I had a couple of 7Ah LiFePO4 batteries sitting on the shelf doing nothing, so I finally got around to building them some proper smaller boxes. These aren't meant to be monster power stations — they're compact, lightweight, and useful for a bunch of different things. Backup power during outages, camping trips, charging gadgets, or just having reliable 12V available when I need it. Even if they don't see much radio time, they'll still get used.
My previous larger battery box has been sitting around as a reminder of what not to do. The inside was a complete disaster — wires running everywhere, components stuck wherever they fit, and the fuse panel buried so deep it was a real pain to get to. Changing a fuse meant digging around with a flashlight, and if anything ever needed serious repair or rewiring, it would've been miserable. I decided I was done with that kind of mess and started fresh with a completely new design.
This time I designed the whole thing myself from the ground up so I could 3D print and fabricate the parts. My main goals were pretty straightforward:
- Make the whole build a lot cleaner on the inside
- Keep the cost down
- Create something easy to replicate that could work as a basic template for battery boxes of any size
- Make it actually serviceable without a fight
- Build it faster and with less hassle than before
The enclosure I went with is a $3 .30cal plastic ammo can from Harbor Freight (caught it on sale). These things are surprisingly tough, keep dust and light weather out, and cost basically nothing. For a small 7Ah battery setup, they're just about the perfect size.
The Removable Panel — The Part That Makes It Actually Usable
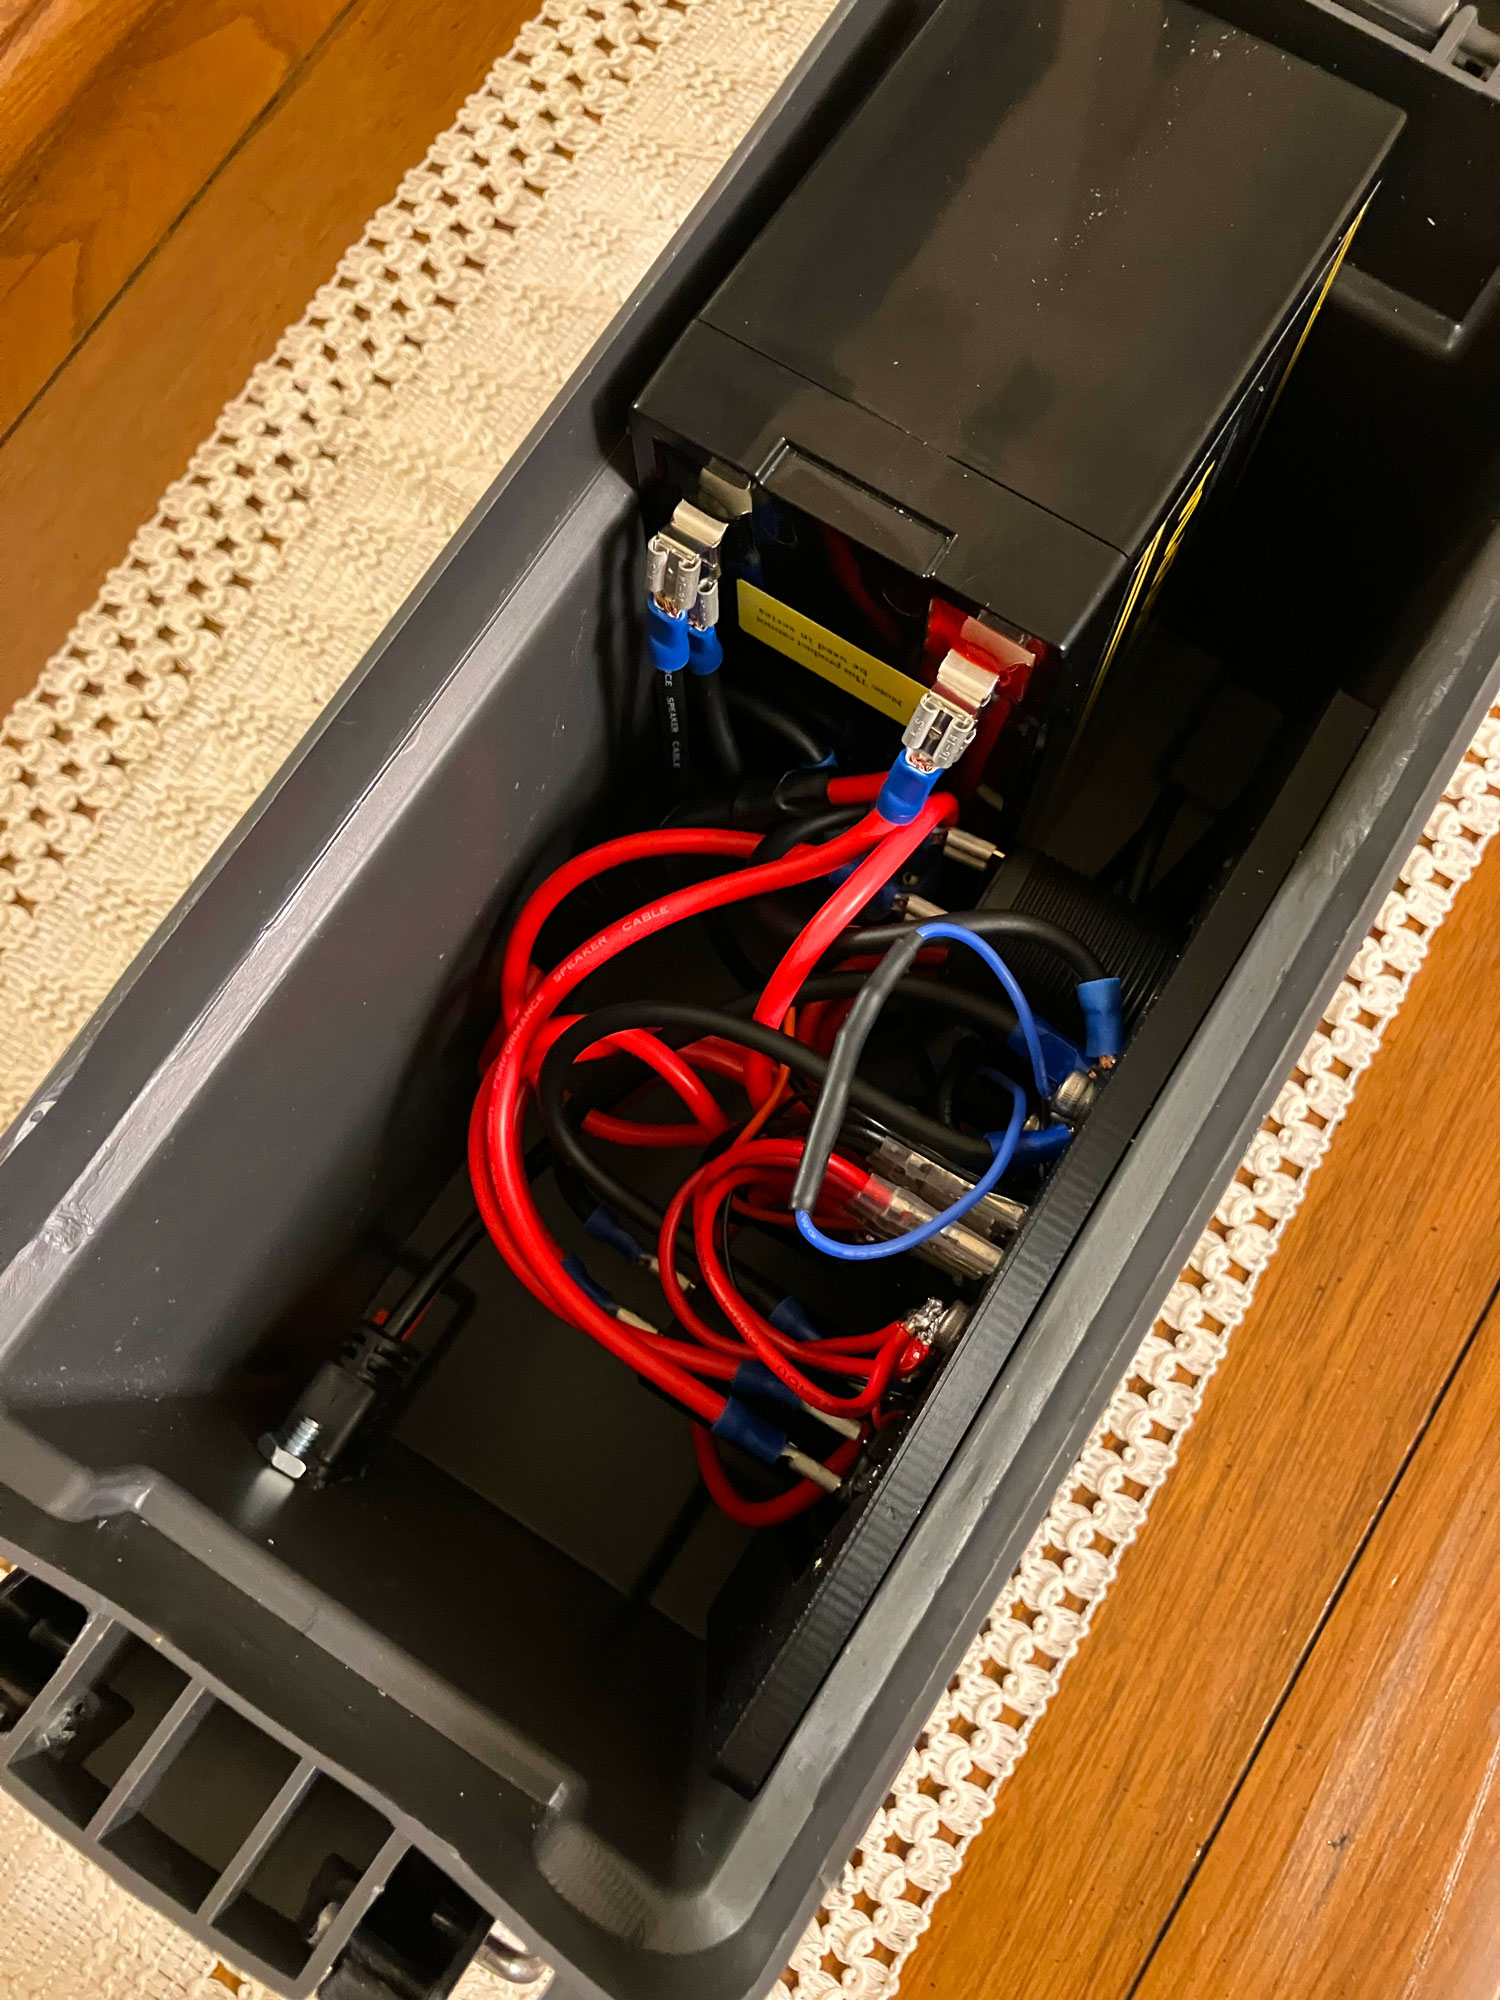
The biggest improvement is the removable side panel that holds nearly all the wiring and distribution components. I designed and printed the panel itself plus a backing plate with heat-set inserts for the screws. It mounts neatly to the side of the ammo can. When you need to get inside, you just back out a few screws and the entire panel pulls out in one piece. No more squeezing your hand into a cramped box or trying to trace wires through a tangle.
The only connections that stay tied to the battery are the short runs from the charging port. Those pass through the panel so they get proper fused protection on the way to the battery and back out for distribution.
I also added a simple panel-mount SAE port (not visible in all the photos) for plugging in the LiFePO4 charger. It feeds straight through the first fuse and into the battery.
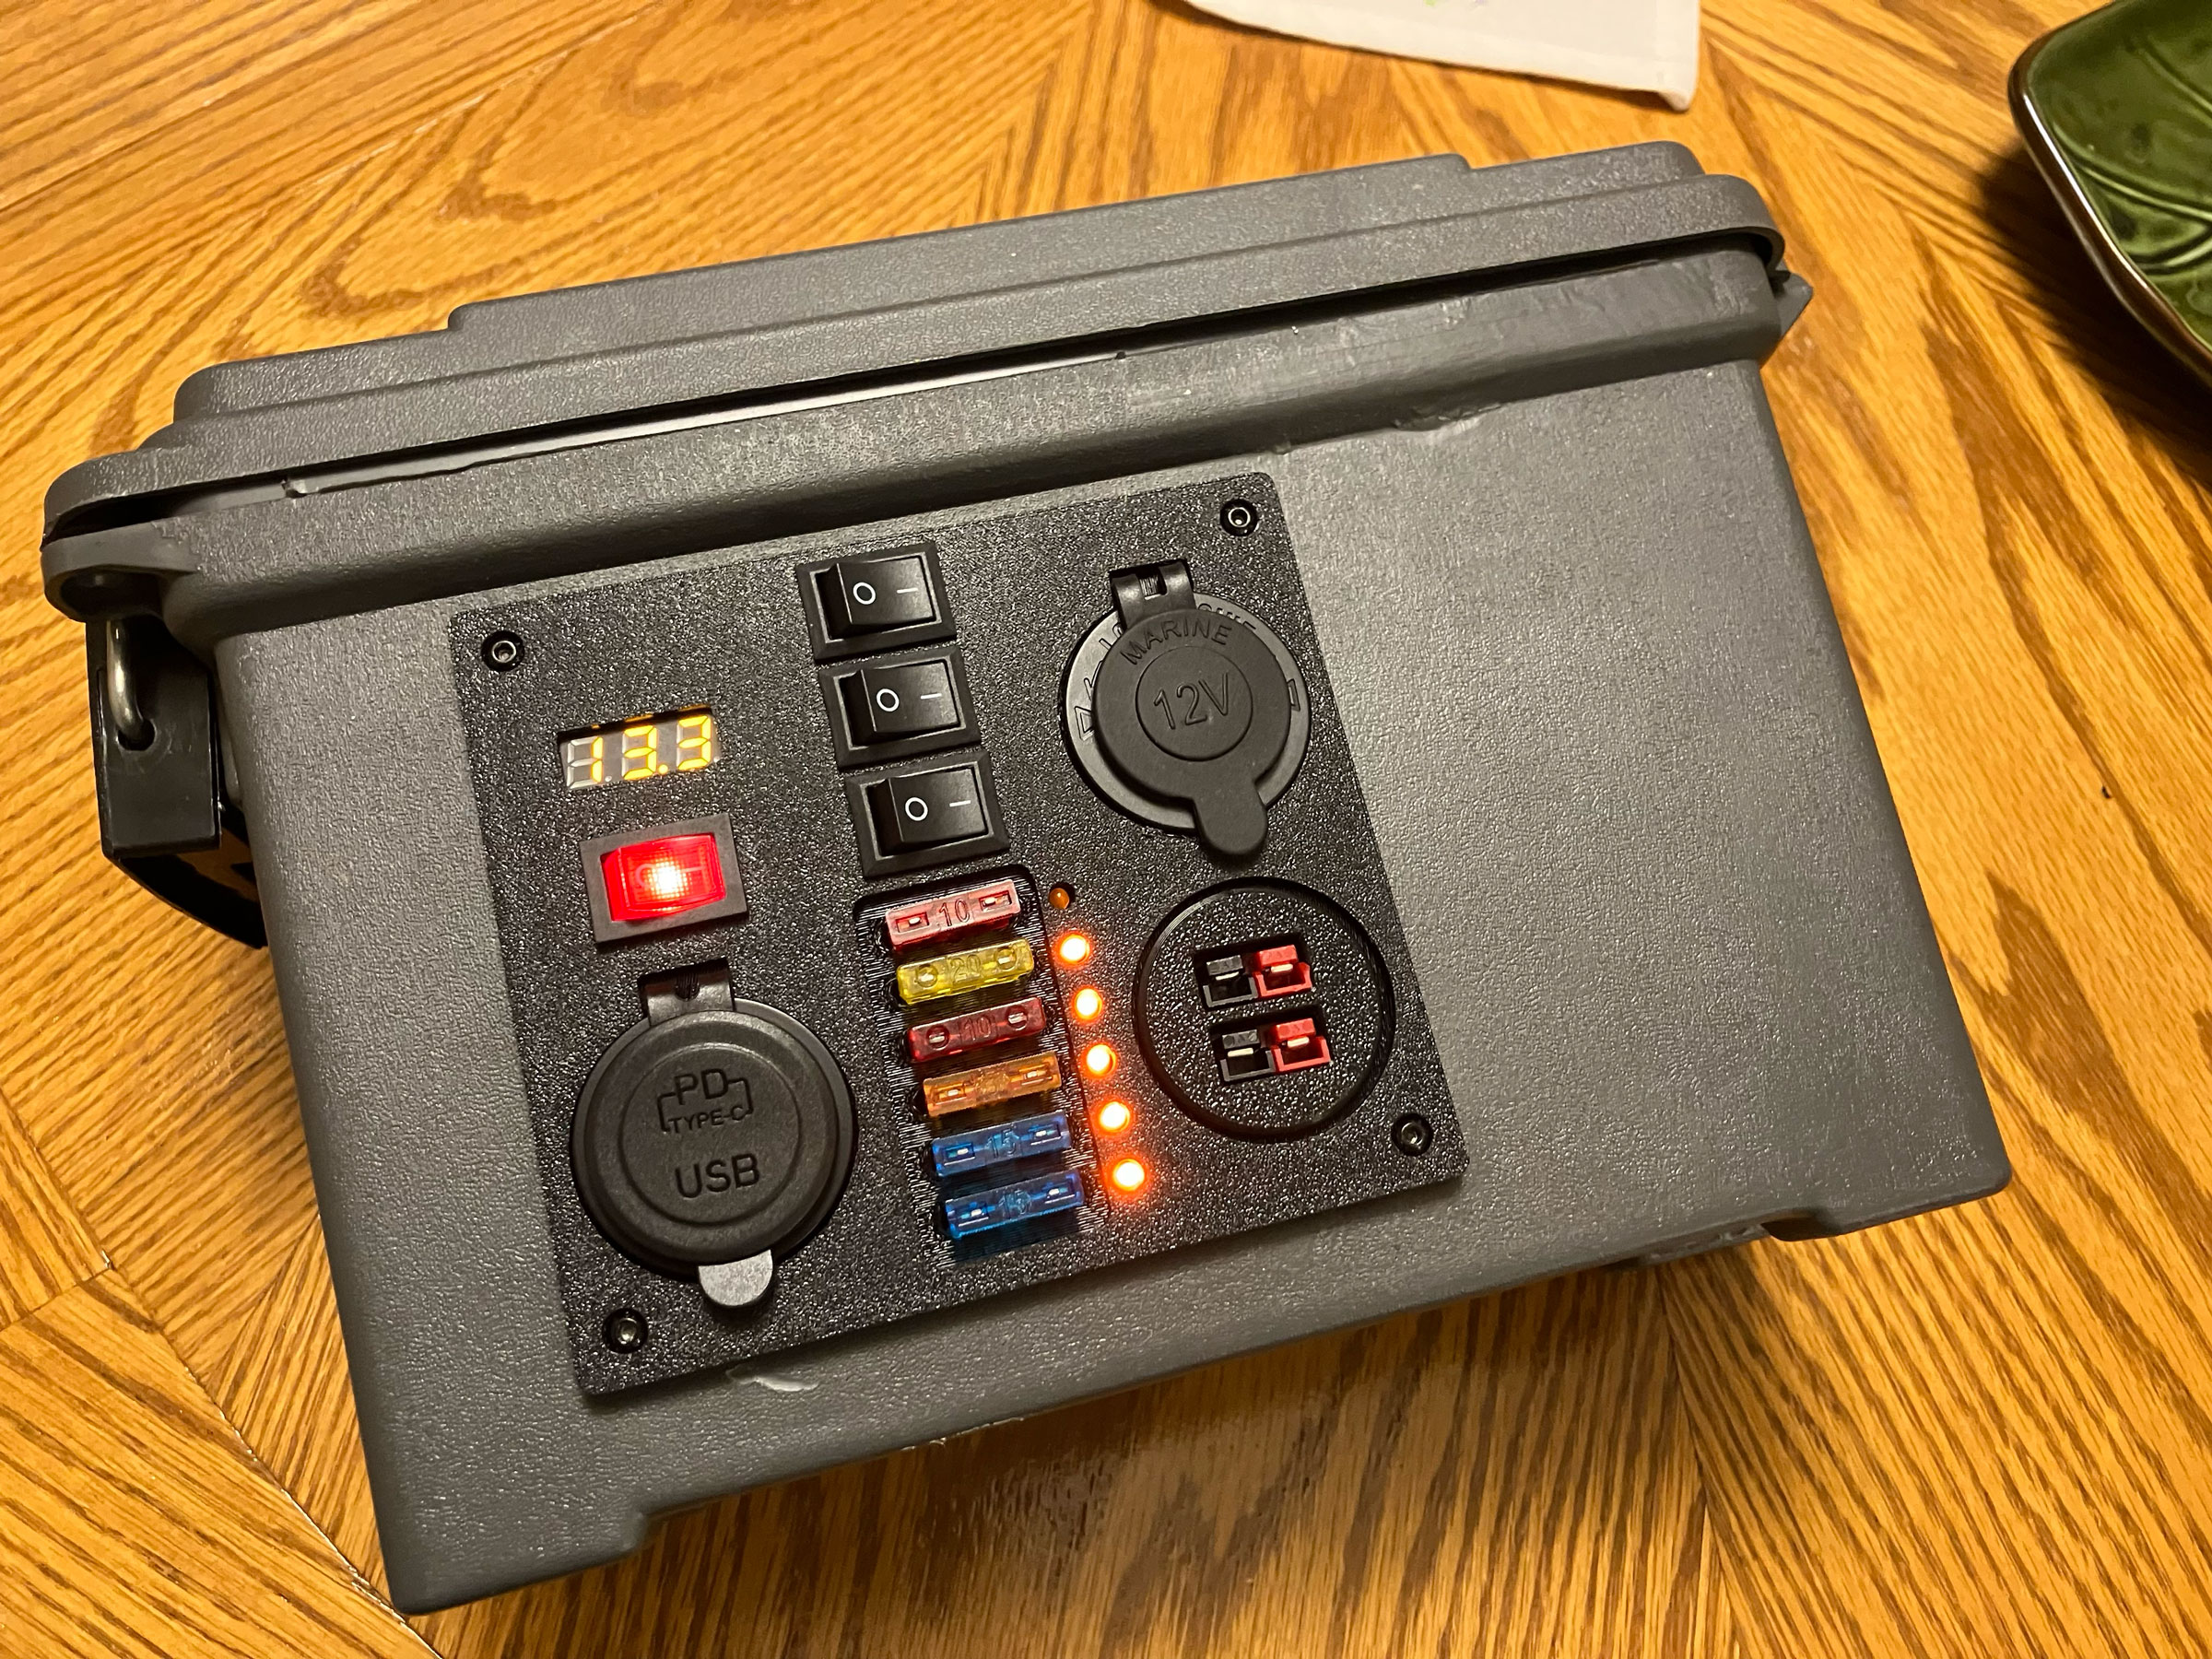
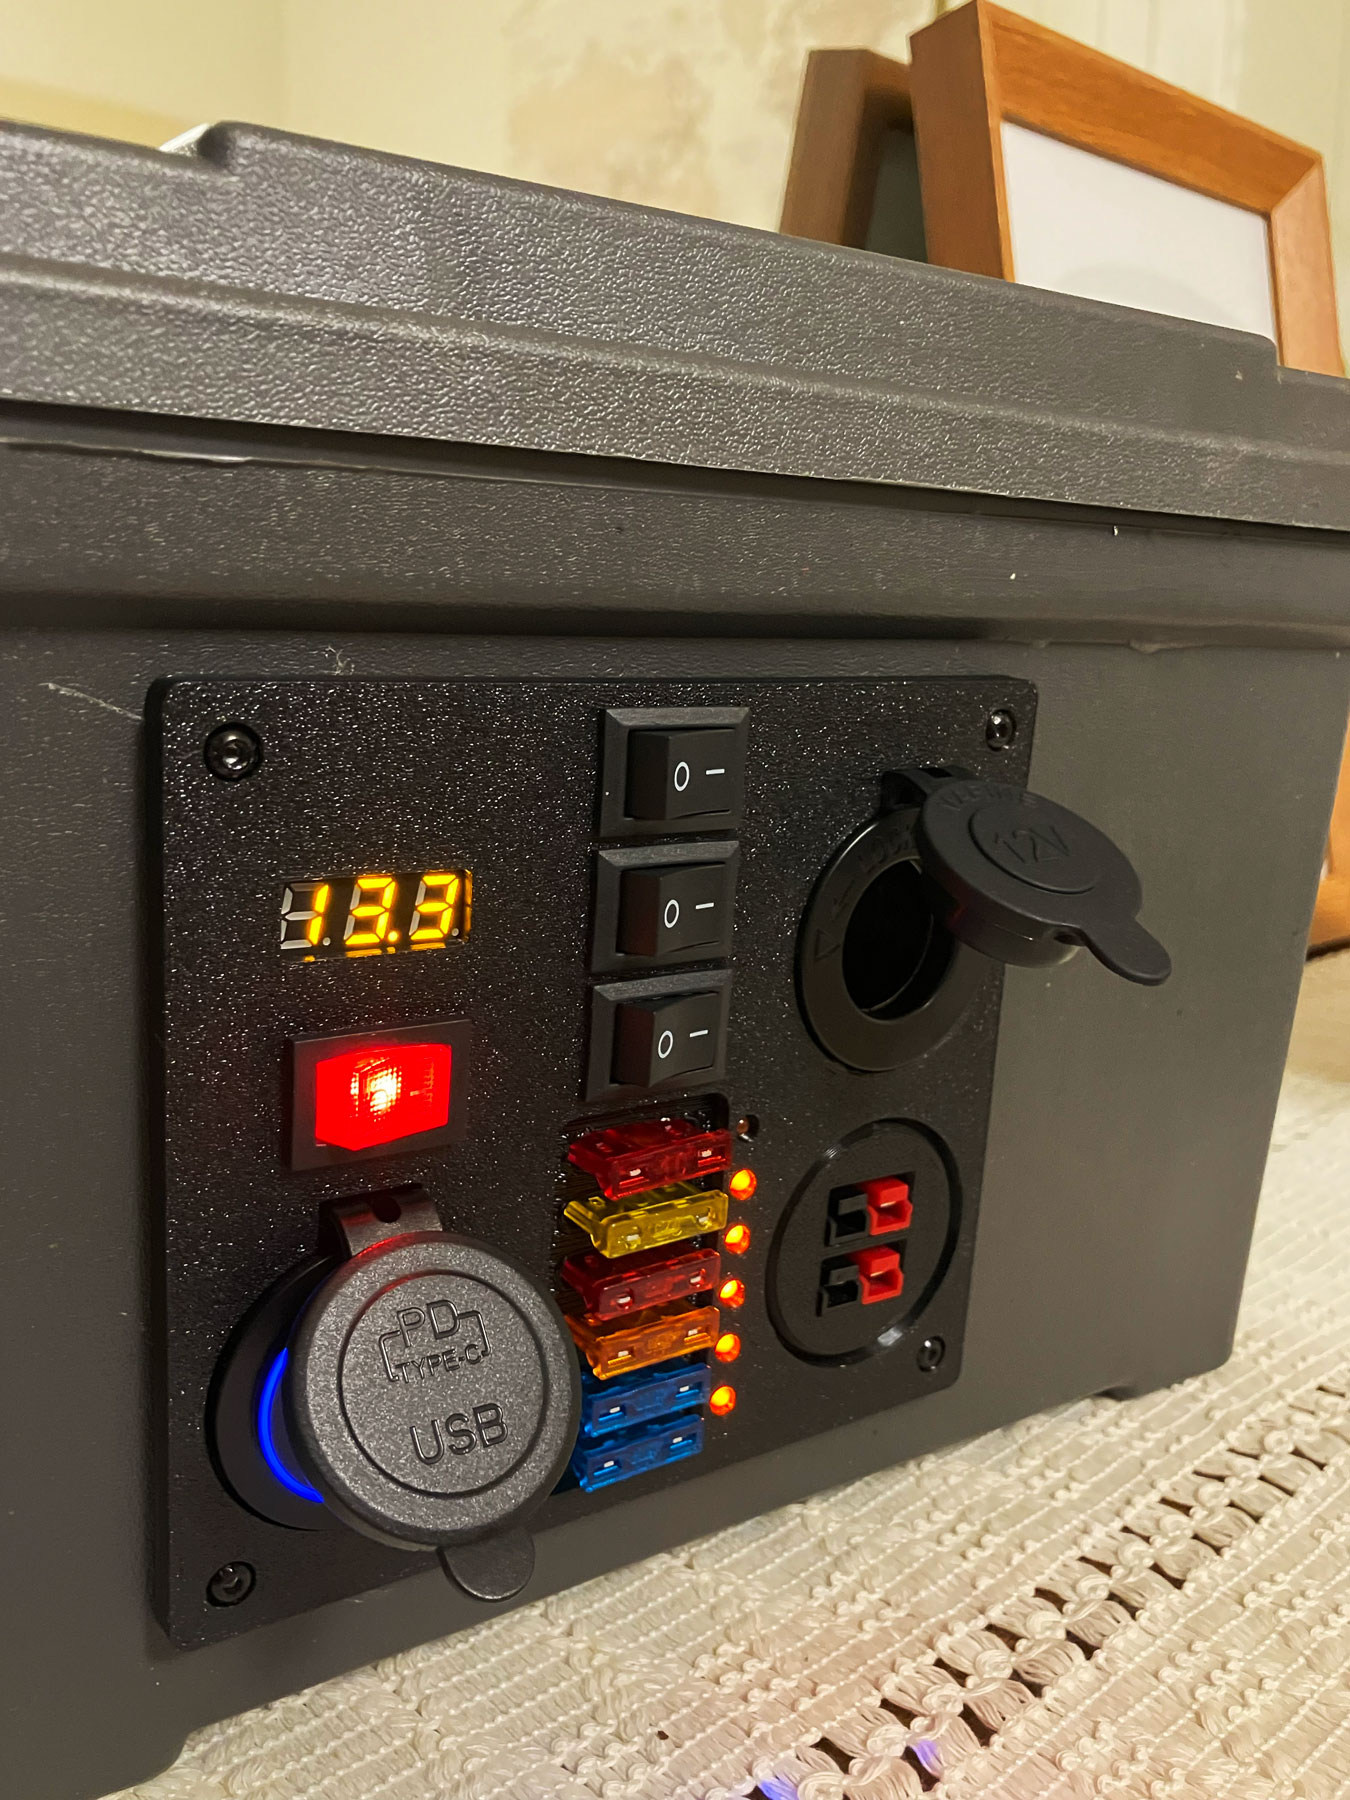
Layout and Features on the Panel
I wanted everything on the panel to be easy to see and work with, especially if you're in a hurry or away from the bench:
- All the important fuses are right on the front of the panel. No more hunting for buried inline fuses or those tiny multicolored ones that always seem to roll away at the bottom of the box. If something pops, you can spot it and swap it in seconds.
- Standard 12V socket — independently fused and switched.
- Combo USB/PD port — handles regular USB and Power Delivery for phones, tablets, or whatever else. Also fused and switched on its own. (Handy if it ever starts causing any noise.)
- Two Anderson Powerpole ports mounted in a custom 3D-printed housing. Each one is separately fused so you can hook up different devices or loads without one issue taking everything else down.
- A master distribution fuse on the output side.
- An extra passthrough fuse on the charging circuit for a little more protection in case something goes wrong between the charger (or solar setup) and the battery.
Inside the ammo can, things stay dead simple — just the battery sitting there. For now I’ve got it held in place with some hot glue, but I plan to cut up a couple of those thick foam kneeling pads from Harbor Freight, shape them to fit the bottom, and hot glue them in for better shock absorption and to keep the battery from sliding around.
Parts and How It Came Together
Most of the sockets, switches, fuses, Powerpoles, and other bits came from AliExpress to keep the cost reasonable. I did grab a couple of items off Amazon when I was impatient for delivery, but the majority of the non-printed stuff was cheap and easy to find.
The ammo can itself was only three bucks. All told, the project stayed pretty budget-friendly, which was one of the points from the start.
As I was putting the first box together, I kept noticing little things I could improve — better wire routing, small layout tweaks, that sort of thing. So version 2.0 is already on my mind and should turn out even cleaner. I’ve also been thinking about trying a panel-under-the-lid design for the bigger metal .50cal ammo cans sometime. Maybe even build a little VHF radio right into one and make a self-contained off-grid box. We’ll see how that goes.
Why I Built It This Way
I enjoy tinkering with this kind of project and like having solid, ready-to-go options around the house or in the truck. A box that’s hard to work on or maintain just doesn’t fit that idea. With this removable panel setup, if something needs attention it’s quick and straightforward instead of turning into a big frustrating job.
LiFePO4 batteries work well for these smaller builds. They’re lightweight compared to older types, don’t off-gas, and hold their voltage nicely under load. They won’t run a big 100W radio comfortably and might even be pushing it at 50W, but they’re plenty capable for lighter stuff like a Xiegu G90 or some of the surplus commercial radios I’ve got around.
What’s Next
The 3D print files are now up on Thingiverse if you want to check them out or build your own: https://www.thingiverse.com/thing:7336224
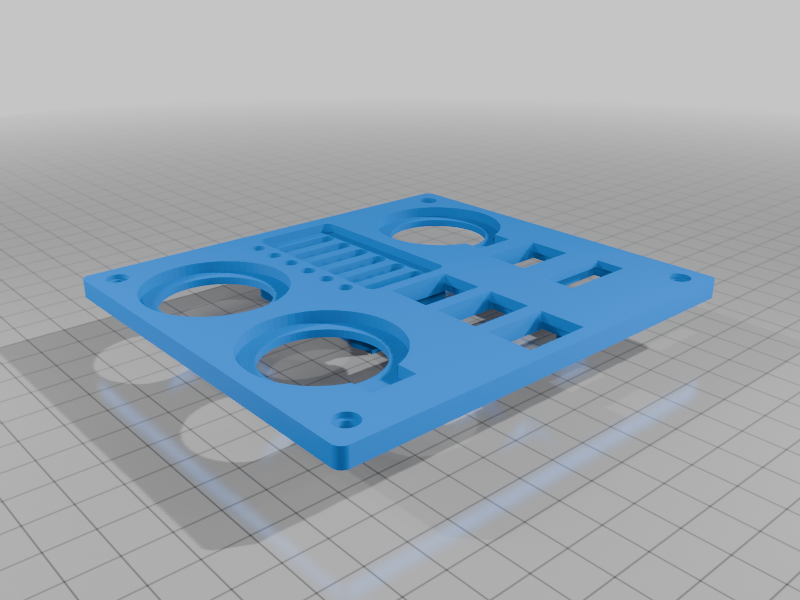
I included the main removable panel, backing plate with heat-set insert locations, custom Powerpole housing, and the other small mounting parts. Feel free to download, print, and remix them — that was one of the goals from the start.
If you decide to build something similar, the removable panel idea is definitely worth trying — it changes how the whole thing feels to use and maintain.
Have you put together any small battery boxes yourself? What kind of enclosure do you usually reach for — ammo cans, plastic cases, or something else? Any tips or things you learned the hard way?
I’m always up for stealing good ideas for the next version.


