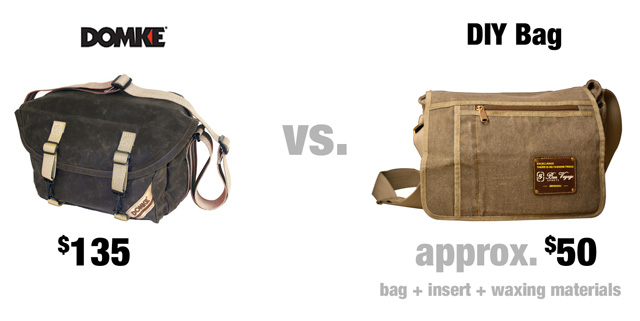
Looking to put together a sexy camera bag? Already have a messenger bag you want to carry your camera in? Love the look and feel of waxed canvas bags but don’t want to fork over the money to buy one new? This tutorial is for you!
HOW TO…Turn a Messenger Bag Into a Camera Bag (pretty simple):
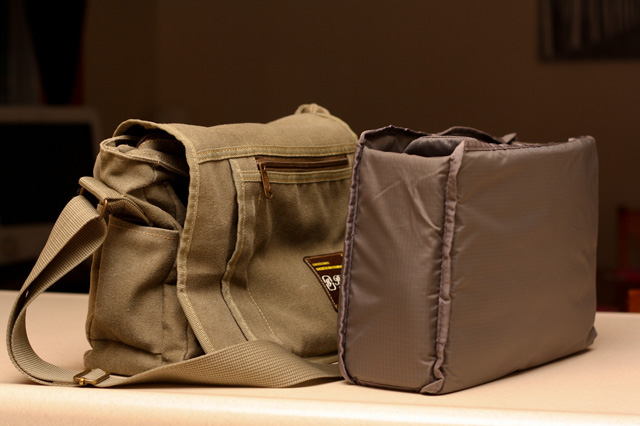
- Get your bag.
- Buy a camera bag insert (such as: http://bhpho.to/1azyl3)
- Put insert into bag…and, voilà!
MATERIALS…To Wax Your Bag
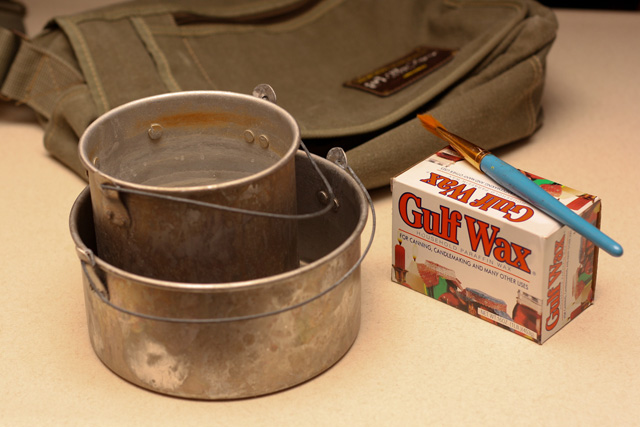
- Your bag (obviously)
- A double boiler. I recommend NOT using one intended for kitchen use…it can be a mess to clean. Rig one out of old pans, coffee cans, or whatever you may have around. I used two old, aluminum camping pots that I had sitting in the basement.
- Wax. Many places recommend a blended mixture of paraffin and bee’s wax, but I used straight paraffin, and it seems to have turned out fine. You can pick up a pound box of paraffin wax in the canning section of Walmart or your local grocery store. You shouldn’t need more than one or two of the included wax bars. – LINK: http://bit.ly/fsoxAU
- A brush. I recommend a bristle brush between 1/2″ and 1″…up to 1-1/2″. Any smaller and it would take to long; much larger, and it would be too unwieldy and messy. I used a half-inch artistic brush I had sitting around.
HOW TO…Wax Your Canvas Bag & Make It Water-Resistent & Durable
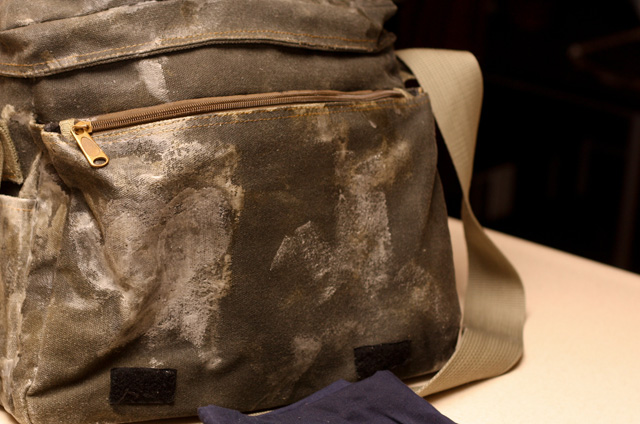
- Put some water in the bottom portion of your double boiler and place it on your stove on HIGH (to get it boiling faster). As the water boils, add a bar or two of wax to the upper portion of your double boiler, and allow it to melt.
- Once the wax has started to melt, dip your brush into it, and begin painting all surfaces of your bag, paying special attention to the seams and bottom of the bag. Maybe coat the bottom a little extra well as this i the area that will be taking the brunt of the wear. Allow was to cool…it will become caked and hardened, but that is okay.
- Put your canvas bag into an old pillow case, and tie off the end. (This keeps the wax from getting all over the place.) Then, put it in the dryer on HIGH for about 15 to 30 minutes. This allows the wax to be evenly melted into the fabric. You can also use a hair dryer (much more of a pain with this amount of wax, but possible) or a heat gun (a bit overkill).
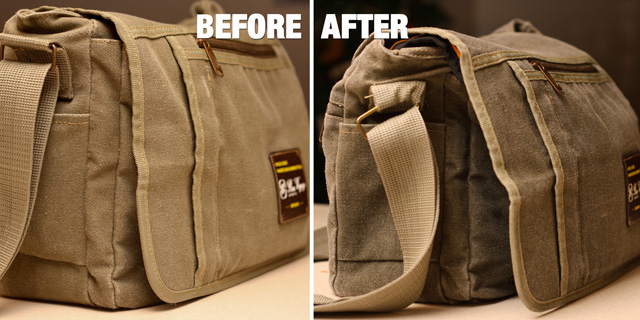
When your bag is finished in the dryer, pull it out and allow it to cool down. It will harden because of the wax between the fibers…this is to be expected. You can now:
- Use it as-is.
- Work the fabric to break it in and soften it a bit.
- Give it another application or two. (I only gave mine one application so far.)
Have a picture of your own camera bag? How about some tips or tutorials? Feel free to send them over, I would love to see them!


